Friday, December 16, 2011

Beginning the Arching

First of all, I'm going to start off by apologizing, I had lost a bunch of pictures that were on my camera, and I had to switch back to using my phone. So I'm going to try to substitute some of the steps of the build process with my cello pictures.

To start out, which I don't have pictures for, you need to join the violin plates in a process that might not be too easily understood by pure text, so I'm going to leave the joining part to you're own means of joining wood.

Once the plates are joined, the bottom of the plates need to be flattened so that the ribs lay perfectly flat against the plate with out needing to be clamped, no gaps under just the weight of the rib structure its self. So once the plates are flattened, you need to scribe the outline of the ribs onto the plates. Be sure you designate a back and top for the ribs, if you scribe on side to the top, and accidentally flip the rib structure, the outline will most likely be off because of any imperfections of symmetry.

So once it's scribed, you'll need to have a washer that measures the size of the overhang of the margins you'd like. For the violin the washer used was about 3mm from the center of the washer to the outside. For the final size of the margins, I was shooting for 2.7mm.

So you take the washer and set it up against the rib structure, and use a pencil in the center of the waster to draw a pencil line 3mm oversized from the outline.

To get the corners, you'll have to draw them in by hand. The corners for the strad model is determined by taking a straight edge from the center line at the head or tail block, and by laying it over the corner on the opposite side of the violin. For example, from the head block centerline, you would lay the straight edge over the lower bout corners and that would determine the angle for how the corners point. You'll want to draw the line for the same overhand for the margins you'd like on you're corners. If you use the washer around the hole thing, you'll have very rounded corners and just don't look proper at all.

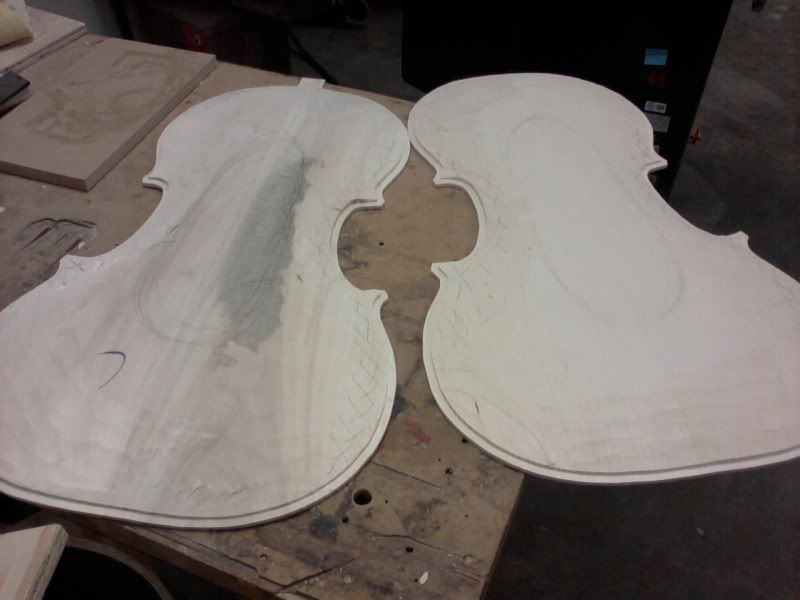
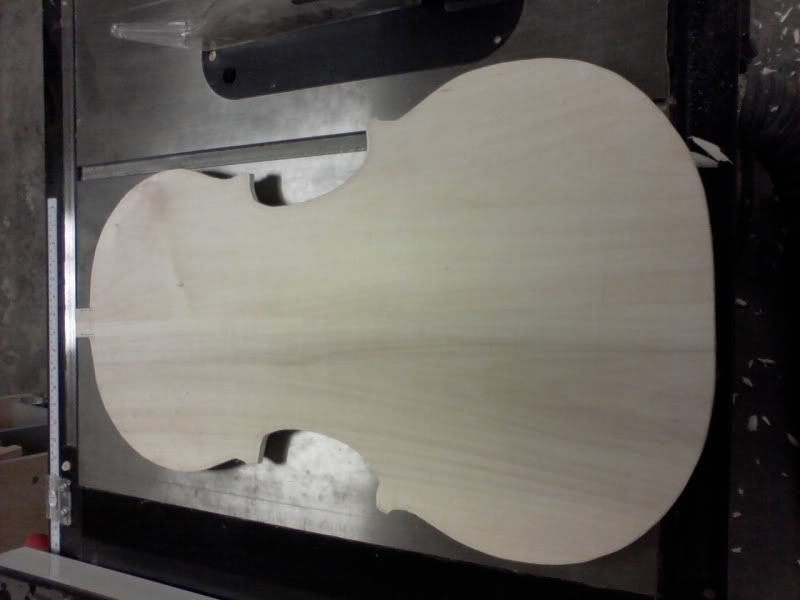
Once your scribe line, margin line, and corners are drawn in, you're ready to cut out the shape of the plates. Here's the picture of the plates after cut out (Cello)
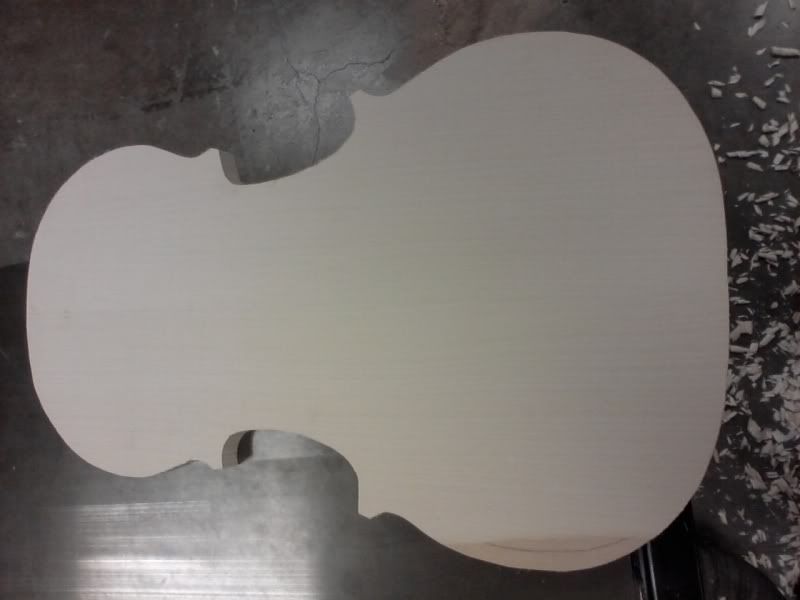
Photobucket

Photobucket

So now the plates are cut out and you need to establish the arch height into the plates. For my cello, the plates shown, I shot for a 27mm top and a 25mm back. So thickness each plate to the arch height that you're going for.

Now the arch height is established into each plate, and it's time to rough arch. The first step is to draw a guide line in the center of each plate of where to NOT touch. You'll want to leave a flat spot so that you can still have a surface for the plates to lay flat so that you can sand the edges a bit closer to the pencil lines for the margins right before spot gluing the plates. So notice in the next pictures shown, the pencil marks marking out the center.

After that, the other thing you'll need to do before arching is mark the thickness you're shooting for at the edges of the plates, which will be the guide line of how low to arch. So for the cello, the upper and lower bouts were marked with a divider or compass, measured from the bottom for 6mm, and the corners, cbouts, and button were measured at 7mm. So once that lines drawn all the way around you have lines all the around of how low to arch, and you have the oval drawn in the top as a guide to not cut into.

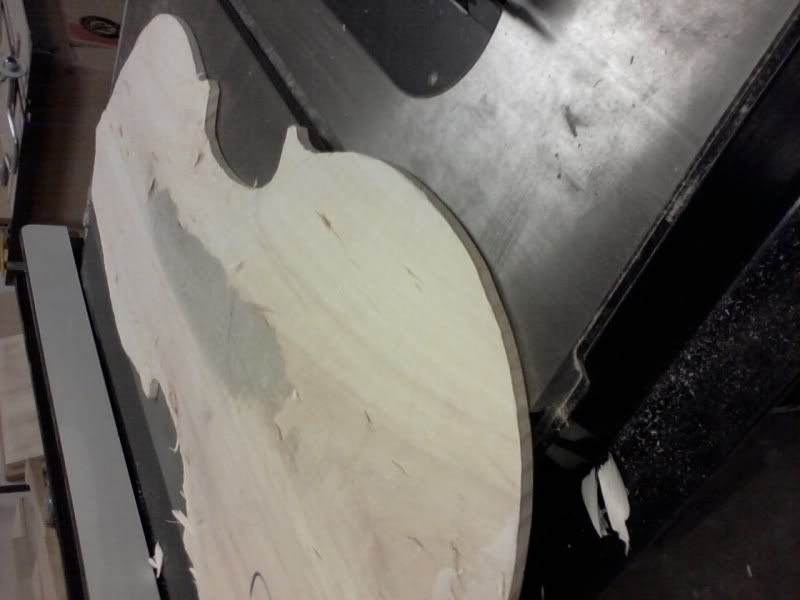
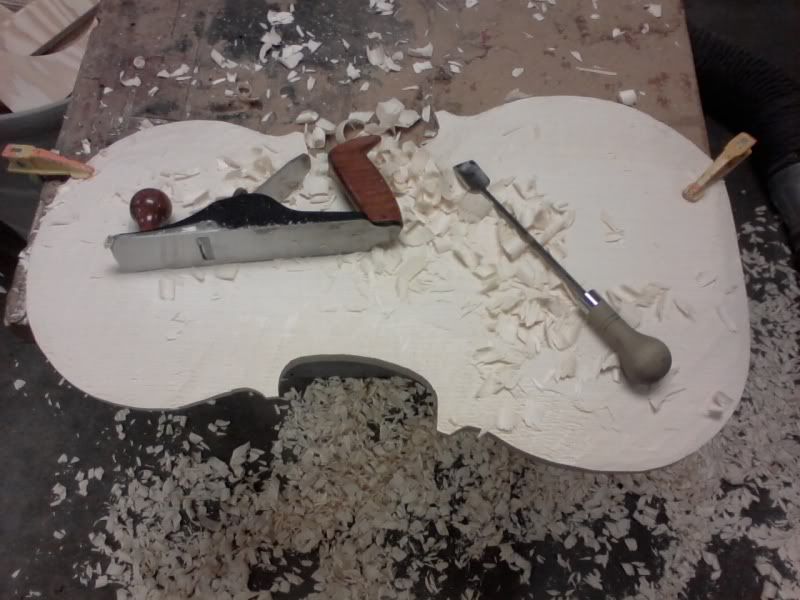
Here's pictures of my cello plates after the first rough arching, pictures of the top shows the scrub plane and the arching gouge used in the process.
Photobucket

Photobucket

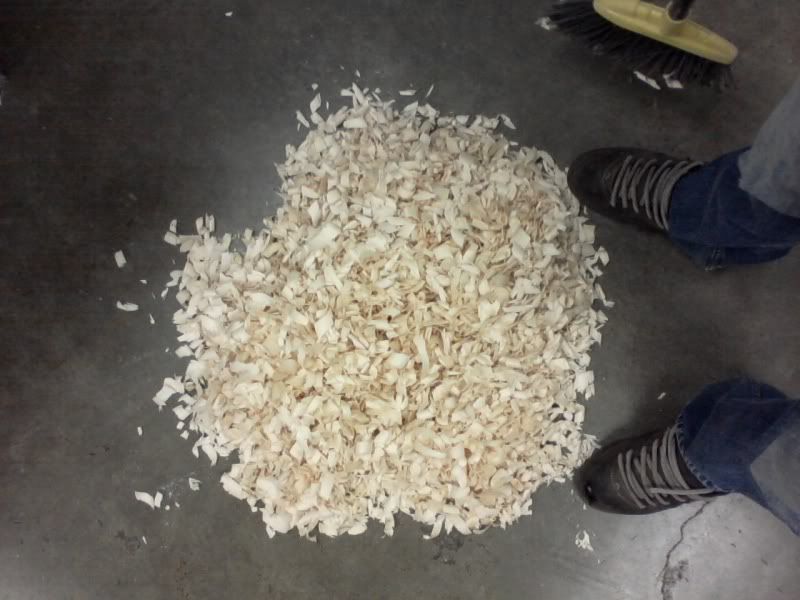
Here's a picture of how much wood was shaved off of the plates for the cello. (Notice the pile of shavings in comparison to my size 14 shoes, there's a few wasted guitar tops in there! Haha)
Photobucket

So now each plate is rough arched to the lines drawn for the thickness around the edges, and the next step is to route the purfling ledge into each plate for the final thickness. Unfortunately the picture of the routing setup was one of the ones I lost, so I don't have a visual for that.

For the routing heights on the cello, the upper and lower bouts were 5.3, the c bouts were 5.5mm, and the corners and button were 5.7mm. When routing the edge heights in, you have to be careful of any spots in the plates that do not stay flat on the table. At least for the routing setup I used, if the plate is curled up at all, when you pass it through it will cut the edge too low, and nailing these measurements will be crucial in the overall smooth look of the instrument.

So here's pictures of my cello plates immediately after routing:
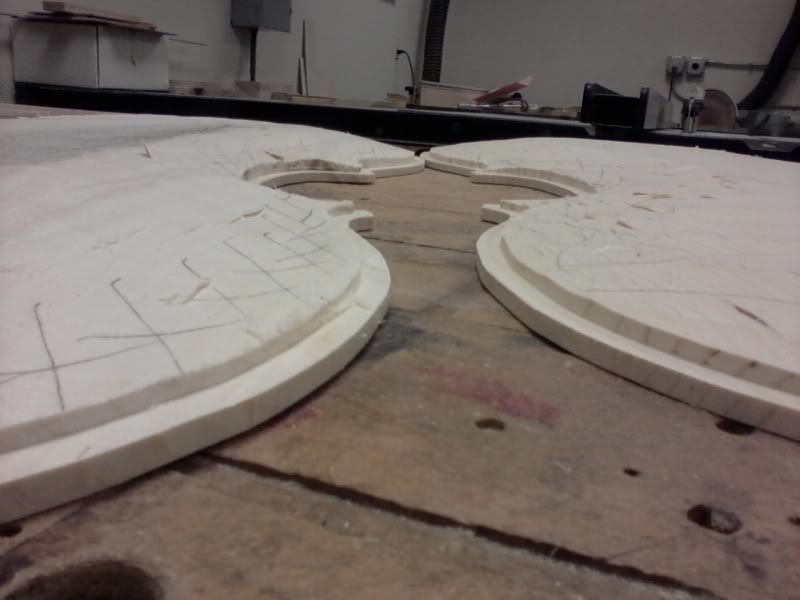
Photobucket

Photobucket

Next step now is the second arching. The lines you're shooting for now is to eliminate the step from the first arching to the edges you just routed. Now the scrub plane can not be used because it will damage the edges that need to be kept undamaged. So with the arching gouge, the step from the routing needs to be cut out and the oval line in the top can be pushed mildly. NOT TOO MUCH. Once the second rough arching is done, the plates will need to rest on that flat oval surface in the top to sand the edges to the pencil lines.

Seeing as how the second arch is much like the first, just with different lines to go by, not alot to say for it, so here's a picture of second arch in progress.
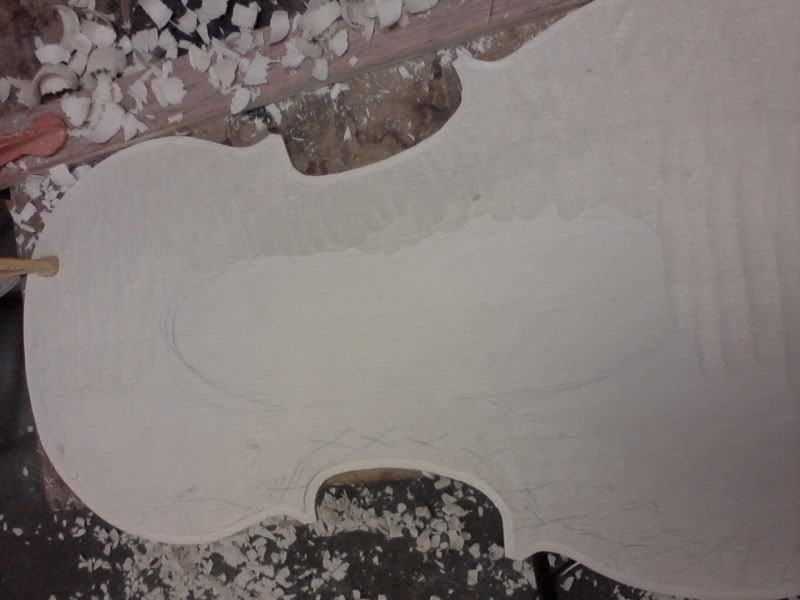
Photobucket

Once the second arching is done on both plates, the edges now need to be sanded close to to the lines like I had mentioned before. Get the line close, be be sure to not go to far as you'll be perfecting the margins with the plates glued to the ribs.

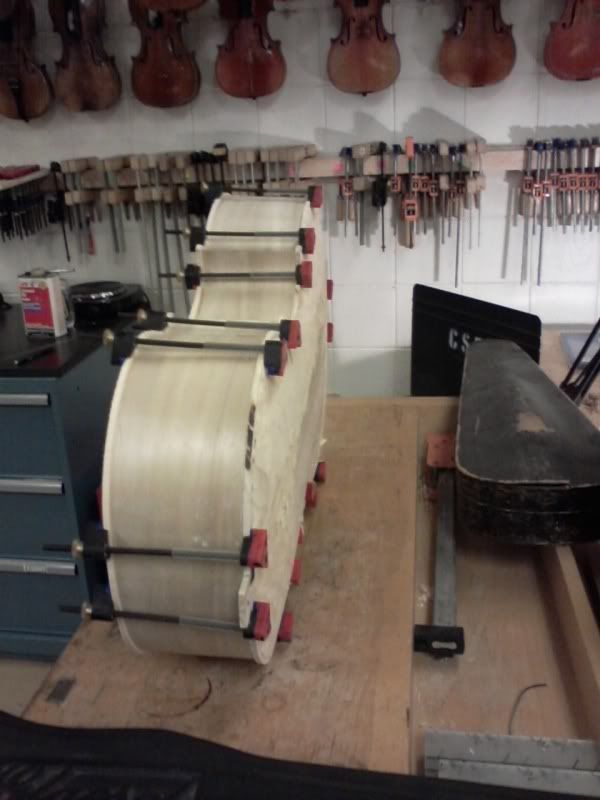
Now, with 2 spots on the neck and tail block, and 1 spot of glue on each corner block, and 1 spot on each middle of each bout of hide glue, you need to spot glue the plates on. Since, if you don't have a break away form/mold there will be linings on the back's side of the ribs, you'd want to spot glue the top first so that there is a larger clamping surface against the linings. And then spot glue the back as well. Do you're absolute best to get the scribe line lined up perfect, because that's what it's there for. This is a step that's very important to dry clamp.

Here's pictures of my cello with the plates spot glued on.
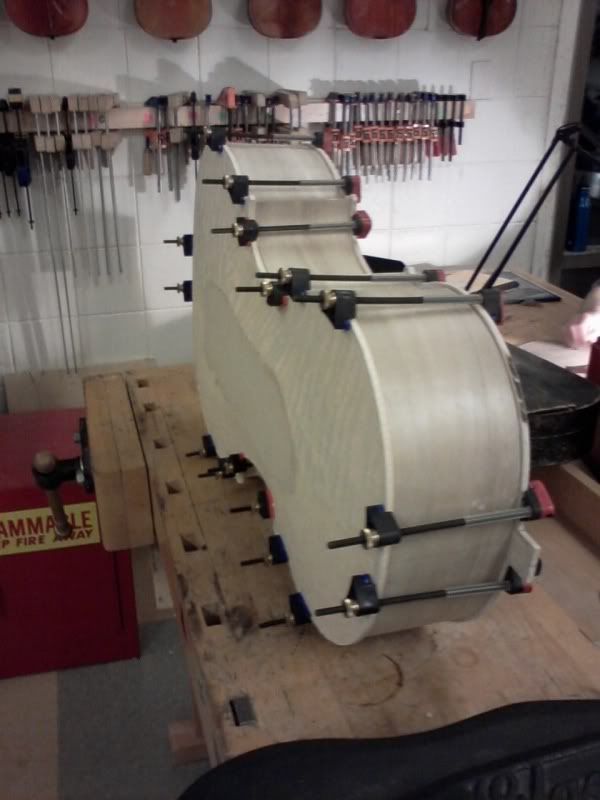
Photobucket

Photobucket

Now with the plates spot glued, you need to find the location of you're purfling channels and drill position holes on the top and back so that you can find the plates to exactly where they are. Since the plates are glued in place, the corners and margins are going to be perfected in that position, meaning finding positioning holes now will be crucial in everything staying even. The plates will be removed again.

So using a block plane, file, sand paper, and alot of patience and measuring, get you're margins to a consistent measurement all the way around. My violin is 2.7mm and my cello is 3.5mm.

The corners are a bit trickier of a process. You need to use a chisel to take the end of the corners and take them down to the pencil line that was drawn in the process of drawing the corners in before cutting the plates out. And with checking the measurement off the top of the ribs to check the overhang, keep adjusting the corners with the chisel until you're very close, and then use a file to keep both plates corners parallel.

I did forget to mention. WHEN SANDING TO THE PENCIL LINE LEAVE SOME BEEF ON THE CORNER'S CURVES FOR SHAPING THE CORNERS WITH A KNIFE.

As the ends of the corners are done, you need to use a very sharp knife to cut the corners down to the pencil lines, BUT BE VERY CAREFUL NOT TO CHIP OUT THE CORNERS WITH THE KNIFES. Cut down into the corners in instances where the knife would cut out the wood grain, especially on the soft spruce.

Now, the entire bodies margins are done, including the corners. Just make sure the positioning holes are drilled, and use a very thin spatula/ mud knife or what ever to pop the spot glue spots loose and take the plates back off.

It's time to route the purfling, I'm not going to include specifics for that, there are different ways to do it, and research on jigs to find the best way for you is best.

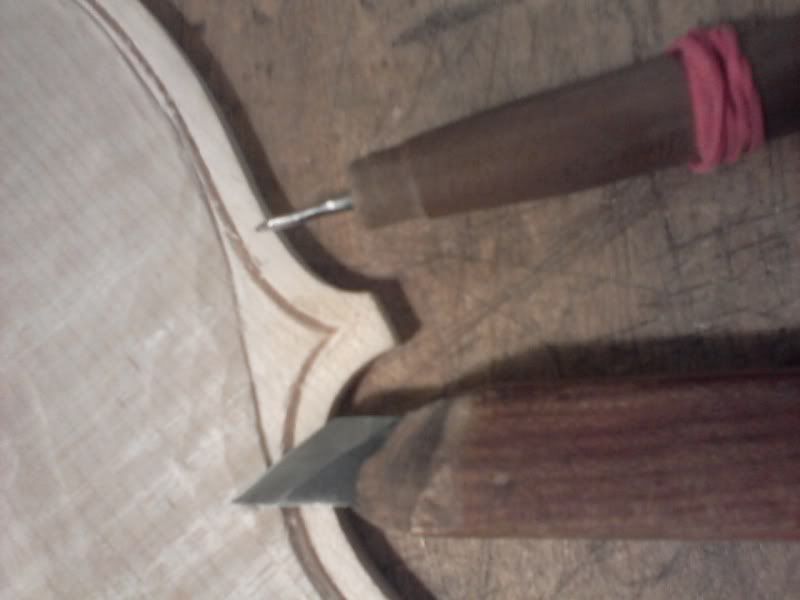
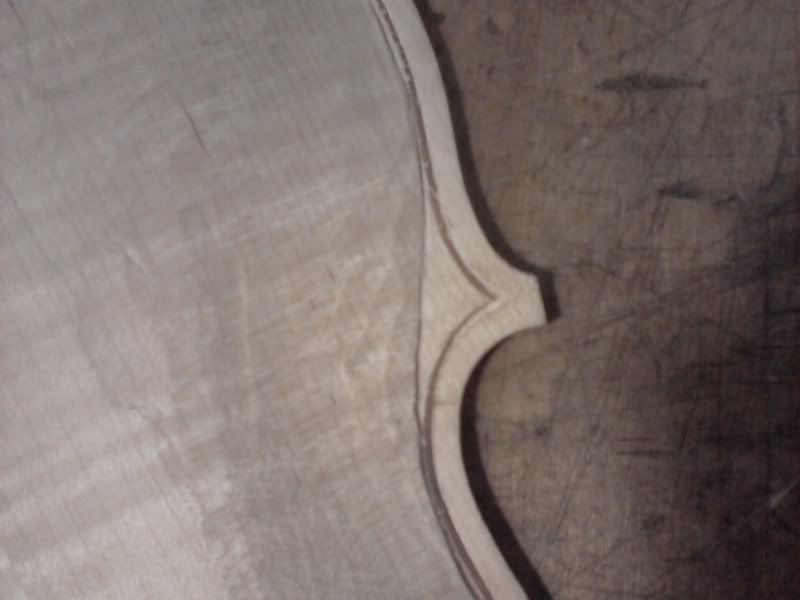
What I will do though is include the picture with mild details of doing the corners. When doing the purfling, you can't route all the way into the corners, the bit cuts in a circle so the corners need to be done by hand. And since it's hard to keep the jig cutting an even distance in on the tight curves, you need to stop right before the corners. With a very sharp knife and a tiny mini chisel, you need to hand cut the channel in the corners. Scoring the lines and then chiseling the wood out, and rescoring the wood to chisel it again until you get to 2mm deep channel is the proper way to go about it.

Here's pictures of the corners scribed in, and then picture of the hand cut channel, and a picture of the 2 tools used.
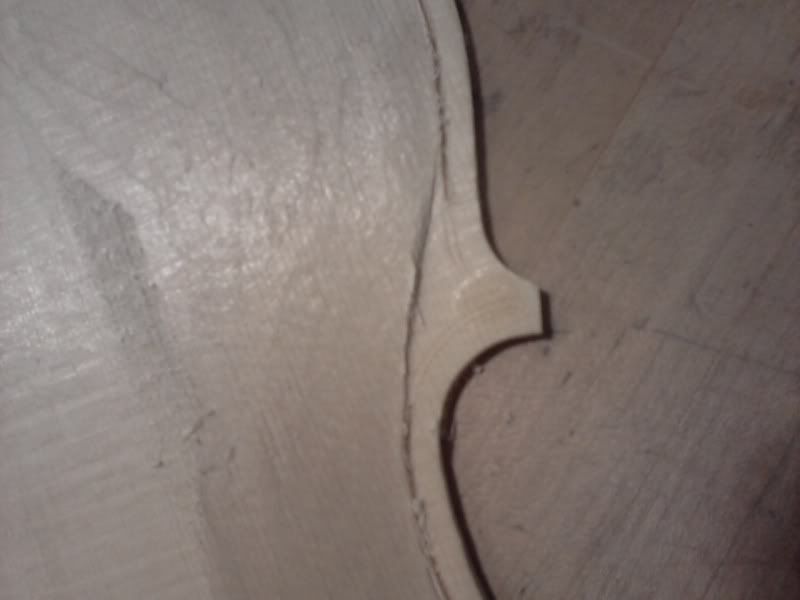
Photobucket

Photobucket

Photobucket

Alright, well that's all for now, keep checking in for more progress!

Wednesday, October 19, 2011

Linings

So once the rib structure is all glued up, you need to glue in the linings. The linings are a bit more complicated than the guitar, because of the multiple blocks and corners, there's a total of 6 pieces that have to be individually bent out of a 1.8mm thick piece of spruce.

There are 2 somewhat tricks to these. Instead of just gluing all of the linings up to a butt joint to each block, the C bout linings require you to notch out the blocks into a mortise for the lining to fit into. So in the last 1/2" or so of the C bout to block,you kind of break off of the bend of the C bout, so there is a gap between the c bout and lining in the corner of the block. (Notice picture)

The reason for notching a mortise into the block with a gap between the lining is pretty simple. If you notched it to stay tight against the c bout, you'd be cutting away glue surface of the block, which would make the rib a bit less secured.

Here's the over view of the C bout linings, notched into the blocks:

Photobucket

So the other little trick is tapering the ends of the upper and lower bout linings to a point, and cutting a slight pie like piece out of the corner of the blocks, so that it can tuck in tight to the corners of the block with out pulling out. This basically clamps it's self fairly tight to the ribs assuming the lengths are dead on.

Here's a picture of a corner:

Photobucket

So as an overview all of the linings are in, the C bouts are notched into a mortise and tenon type of joint to keep the linings held in, and the upper and lower bout linings are tapered into the corners to be held tight. Keep in mind, when you do the linings, you can't do both sides or your mold is going to be stuck inside your ribs. Unless of course, it's a break away mold in which that won't even matter.

Photobucket

Monday, October 17, 2011

Catching Up With Cello Progress

Since the processes are basically the same, but on a different scale, I've been a bit lazy with pictures for the cello.

With that said, here's several pictures of the cello so far. There's been plenty of set backs with the cello build, because of the size of the instrument it's quite a handful. Not to mention it's temporarily fallen down the priority list a bit, hopefully not for long.

Let there be pictures:

Caving blocks

Photobucket

Upper blocks carved, starting dry clamp:

Photobucket

Upper bout glued up

Photobucket

Upper bouts glued in

Photobucket

Photobucket

Gluing in the Upper and Lower Bouts

So now that the C bouts are glued in and all of the ribs are bent, the next thing to do is prep the blocks to take the ribs.

First off, you need to trim down the overhang of the c bouts to a few millimeters proud of the blocks. Then with the template on, and an incannel gouge handy, lightly cut the outline of the template into the block so you know where to gouge to. Also, picture the curve of the corners extending through the C Bout overhand, and cut that in as well. So what you're doing is mitering the C bout to about a 45 degree angle so that you'll have a nice lap-joint against the upper and lower bout ribs.

Here's a picture of the block carved with the miter cut into it:

Photobucket

Photobucket

Now that the blocks are ready, you need to have some clamping cauls handy to contour the blocks, and the ribs will have to be touched up so that they are a nice fit against the blocks, assuming that they moved and/or didn't get a perfect bend from the bending mold in the first place.

Just to note, it's better off to not have the clamping cauls any longer than the blocks of the violin it's self. If the clamping cauls overlap the violin blocks by too much, it's distributing clamping pressure in places that do not need it, and probably not going to clamp the blocks as well as you'd want.


Here's a picture with a bar clamp on each block, and the clamping cauls over each block. Notice, my clamping cauls are overlapping, which I learned the hard way makes things more difficult.

Photobucket

Since the process is the same for the upper bout as it is the lower bout, here's the pictures of that as well.

Photo of the upper bout mitered corners and carved block:

Photobucket

Here's a photo of all of the ribs now in place. Again a bar clamp for each block:

Photobucket

Thursday, September 15, 2011

Catching Up On Violin Progress

So since I hadn't had a camera other than my phone, which took the batch of poor quality photos in the previous post, I haven't had anything to take pictures. So like I said before I got a cheap camera, and I can actually track the progress now. With that said, I missed a bit of the immediate violin progress, but I may be able to iterate what that consisted of in a nutshell.

So to kick this build off we started with a set of a template of half of the violin and a form. I chose to build the Strad violin over the Amadi or Emil and not for any reason other than I recognized the strad name.

So once I had the form and template, I was given a spruce block roughly 3x3x4 or so. I then had to split it with a knife and hammer to see how straight the grain split because that helped to know where and how that block could be used, with out the grain causing any kind of problems during construction by hooking your chisel the wrong way, and digging in and ruining your neck angle while hand cutting the dovetail for the neck.

So once the blocks were roughed in in size by splitting, we then had measurements to make each block to, and they all had to be "perfectly" squared up with a 70 dollar piece of perfection known as the 50mm starret square. So all the blocks had to be squared and then sized to these heights:

For the neck block it had to be with in .1mm or better of 31mm starting height and 30mm ending, the 1 mm leaving room to sand it once the rim is built.

For the upper c bout blocks they needed to be taken down to 32.25 start and 31.25 finish, again 1 mm leeway for sanding.

For the lower C bout blocks they needed to be 32.75mm start and 31.75 finish.

For the tail block it needed to be 33mm start 32mm finish.

Keep in mind everyone of these 6 blocks take a decent amount of time. You're starting face has to be perfectly square to an edge, and both of those faces have to be perfectly square to both top and bottom. Since these blocks are going to be glued to the form, you need a nice square surface for gluing, along with a very flat bottom surface that will not teeter or wobble on a flat plate. The taper from the tail to the neck block needs to be accurate enough that if you put the template over the blocks, you can not rock it at all, and it lays flat over every single block. So there isn't much room for error in those measurements.

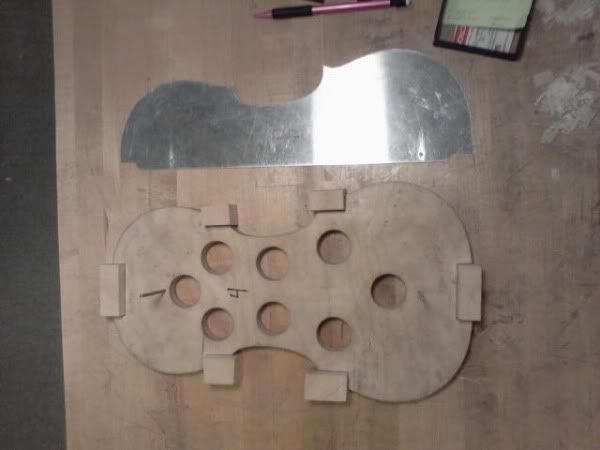
Before gluing the blocks you need to center the form in the middle of the ribs. So you take the highest rib height (In this example it's 33mm)and you subtract the thickness of your form (which I do not know the thickness of) and then divide that measurement by 2, and that would be the measurement of how high you need to shim the form while gluing the blocks so that the amount of blocks sticking up proud of the form is even on both sides. It's also so that you can get your kerfing lining glued onto he sides while the form is still glued in.

So with that description of the process in a nutshell, here's a picture of the violin after the blocks have solely been squared and glued in place.

Photobucket

So the next step from that point is to place the template on and start chiseling all of the blocks to the line of the template, basically scoring a line right up to the template for reference. All of the blocks need this done,EXCEPT FOR the upper and lower bout curves which will be attended on after the C bout ribs are glued in.

On the convex curves you need to use an incannel gouge, and for the neck and tail block, regular chisels are required. Once the blocks are close, I've got a bird tongue file which my instructor implied was a godsend, and I can't say that I disagree. Using the bird tongue file, you basically get the block perfectly flat, until you meet the score line you put in from the template. While doing this, the blocks have to frequently be checked for flat with a straight edge.

Here's a picture of the blocks finished. Notice I did not touch the outside corners to the c bouts. Again that will be done after the C bouts are glued in.

Photobucket

So when the blocks are done, and you haven't touched the upper and lower bout points, you need to get the ribs ready. To do the ribs you need to square them up like everything else. Need to flatted the bottom completely, and square the ends up to them.

Here's a picture of the light showing through the bottom of a rib on the flat plate, obviously not square, or ready to be used. Because of the little tolerance in the height of the rest of the blocks, the sides have to be perfect. If they are not flat, and there is a spot that is under flush to one of the blocks, it will affect your rib height to cut down to that rib. Therefore flat is good.

Photobucket

Once the bottom is flat, for the c bout for this violin I measured 14cm, which left about 1.5cm over on each corner. The ends needed to be squared, because if they weren't it would affect the clamping pressure, which I'll mention again in a bit, that's a bit ahead. For the upper and lower bouts, since my ribs were long enough for 1 piece to do both sides, it eliminated the need to do a butt joint down at each center line. So squaring the ends are not crucial, and neither is cutting the length to a specific one. Although, knowing the lenghts of the ribs is required to know how much leeway you have. So... here's the measurements:

Upper bout: 18.5cm
C bout: 14cm
Lower bout: 22cm

Granted those are the measurements for this build, I'm sure they are going to be similar to that on most.

So at this point, we've got flatted bottoms, and squared ends cut to length if they need to be, so the next step is cutting the height. The way this is done is to basically trace the TALLEST block of that SECTION, onto the rib. Meaning, for the upper bout, if you check back to the measurements I listed, the upper bout blocks are taller than the neck block, so you'd trace the height off of those, or your going to cut them short. Same goes for the lower bout. You'd measure the height of the tail block since that is the highest block of that section.

Here's a picture of what I mean:

Photobucket

Photobucket

Here's the C bout ribs flattened, cut to length, squared on the ends, and cut to height, basically ready to bend.

Photobucket

Here's the over view of where everything is at, although in this pictures the upper and lower bout ribs aren't flatted or cut to height, but let's pretend they are. So in this picture, the blocks are ready, and the ribs are ready to bend (pretend, remember?)

Photobucket

So with that said, here's the C bout bending jig in action.

Photobucket

And here are the C bouts bend and set in place

Photobucket

Photobucket

And since I forgot to take a picture of the upper and lower bout jigs, which I intend to post someone else bending theirs in action, I'll cut to the chase with both upper and lower bouts bent, and the cbouts clamped into place.

The upper and lower bouts will have to be touched up by hand on a bending iron to get a nice fit, and notice they are taped with masking tape to keep them from springing back out of shape.

And I mentioned it earlier, the reason why the C bout ribs have to be so square at the end is because of how the pyramid clamp works. With tapered ends, the pressure would not allow your cbout to push in tight to the blocks.

Photobucket

That was last nights progress. More will be up as soon as it gets done.

New Shop, New Builds

So at the tail end of August of moved back up to Red Wing MN for another year of school consisting of violin construction and repair, and with seeing as how I was here last year and was able to setup some "ins" I was able to land an apartment this year that included a pretty solid space for a shop setup.

I've created this blog to track the progress of both my Violin and Cello build as like a build journal, but also I'll be including anything that I happen to do at home in my spare time, for example any guitar projects I start building.

I've got plenty of pictures to kick of this first post seeing as how far behind I started off. I was off to a late start seeing as how I didn't own a digital camera. Thanks to the local pawn shop I got hooked up for 35 bucks on some young bucks old Cannon Powershot.

Anyhow, here's some pictures:

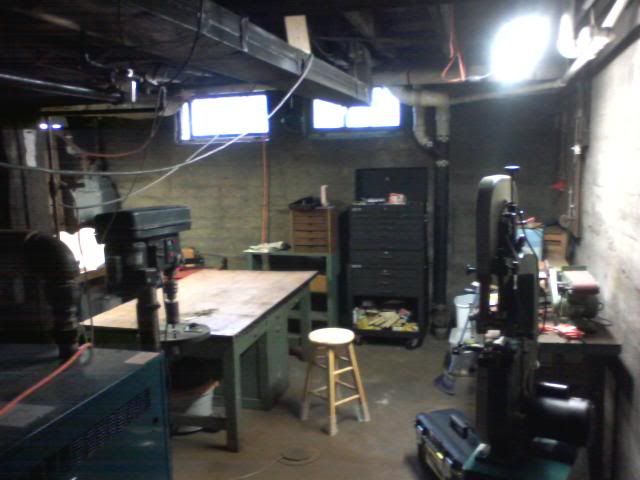
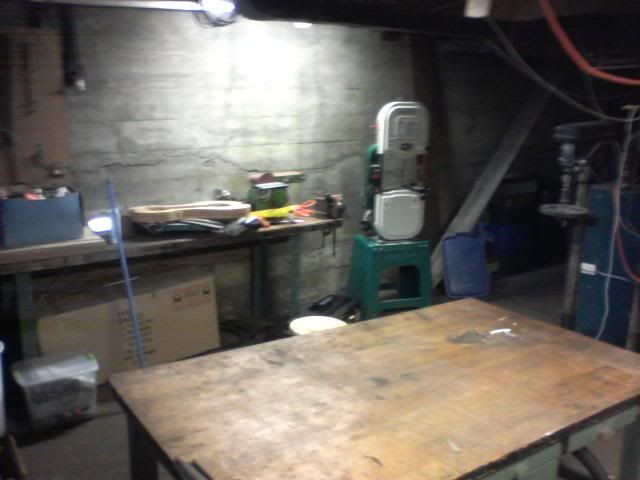
First off I'd like to kick it off with a couple pictures of my shop setup which has graciously been included in my rent for my apartment, and I couldn't be happier with the setup. I brought all of my tools up in my van, along with a humidifier and dehumidifier to control the climate for my wood and projects.

Photobucket

Photobucket

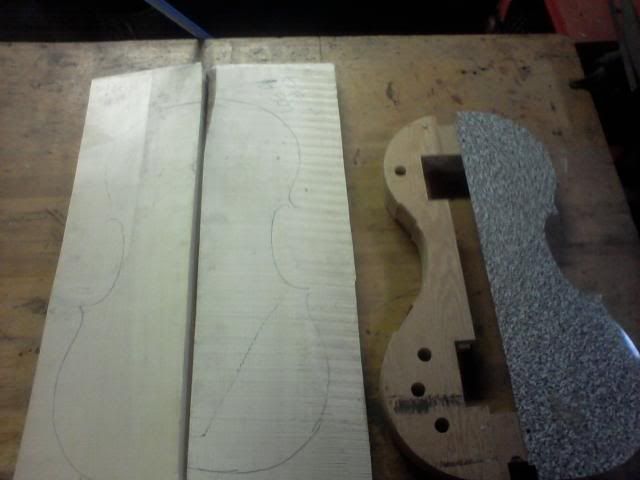
So initially coming up here for this Violin program this year, I had tried to email my instructor ahead of time to see if I could attempt to build a cello, instead of a violin. Despite my many emails and attempts to sway his decision, I was shot down, but came to an agreement where I'd build a cello in my spare time and try to keep up to speed with the violin outside of class, and he'd take a look at progress so I could capitalize on his expertise when needed. I borrowed the cello form from a buddy of mine who attending the Chicago school of violin making about 10 years ago, and I bought the materials to make a spruce/poplar cello.

Anyhow, one thing led to another and I ended up signing up for another class to have time to build my cello in the schools shop along with building my violin on different days. So for now I work on violin Monday and Wednesday nights, and I work on the cello Tuesday and Thursday nights. As soon as I start to fall far behind the violin progress, I'll be bringing the cello home to get caught of to speed over the weeks, or at least attempt to keep up to speed.

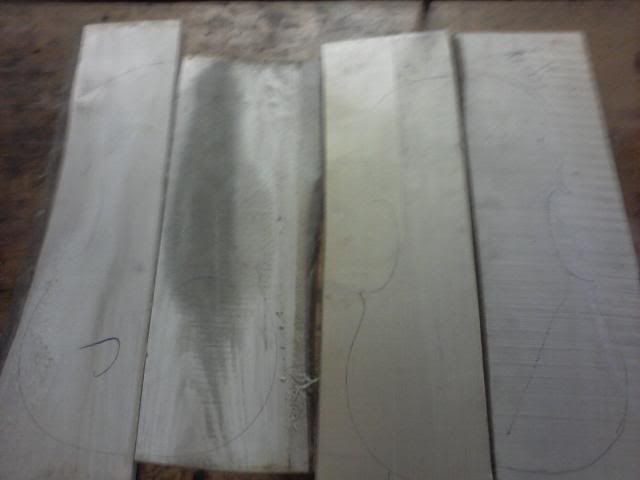
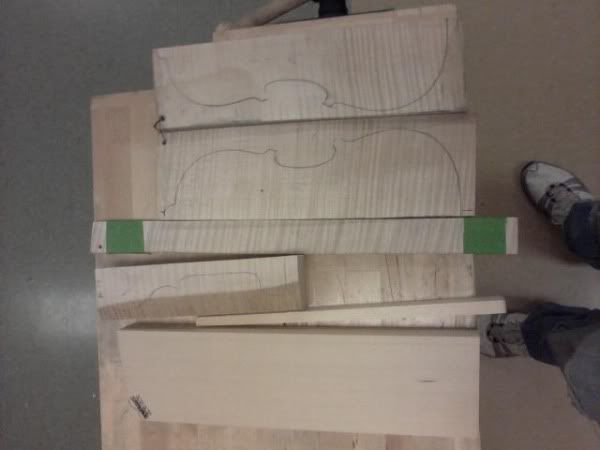
So, here's pictures of materials for both instruments:

Photobucket

There's the poplar back, and the spruce top. The block I resawed the ribs out of I do not have a photo of, but soon enough there will be pictures of the poplar ribs on here.

Photobucket

And this is as obvious as it looks, the top again, along with the form that I'm borrowing with the template included. It's a 3rd generation Gofriller cello.

Photobucket

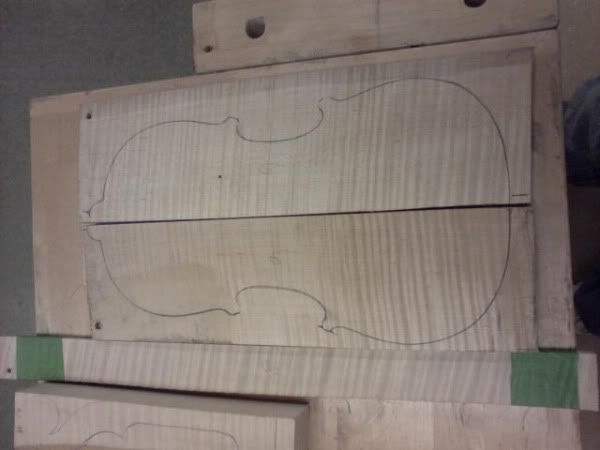
So I was lucky enough to have 3rd pick on some beautiful batch of curly maple violin back, ribs, and neck block, and I also ordered a pretty decent AAA spruce top. Here's an overview of basically all of the materials in scratch form of what will build the violin. Notice the top came in a billet that still has to be sawn in half.

Photobucket

Closeup on the flame of the back.

Until next time--